
How To Use EQ in Studio
Overview
The EQ (Equalizer) is a powerful audio processing tool that allows you to shape the tonal character of your sound by adjusting specific frequency bands. This graphic equalizer with additional parametric controls provide precise control over your audio spectrum with multiple adjustable bands.
Interface Components
EQ Toggle
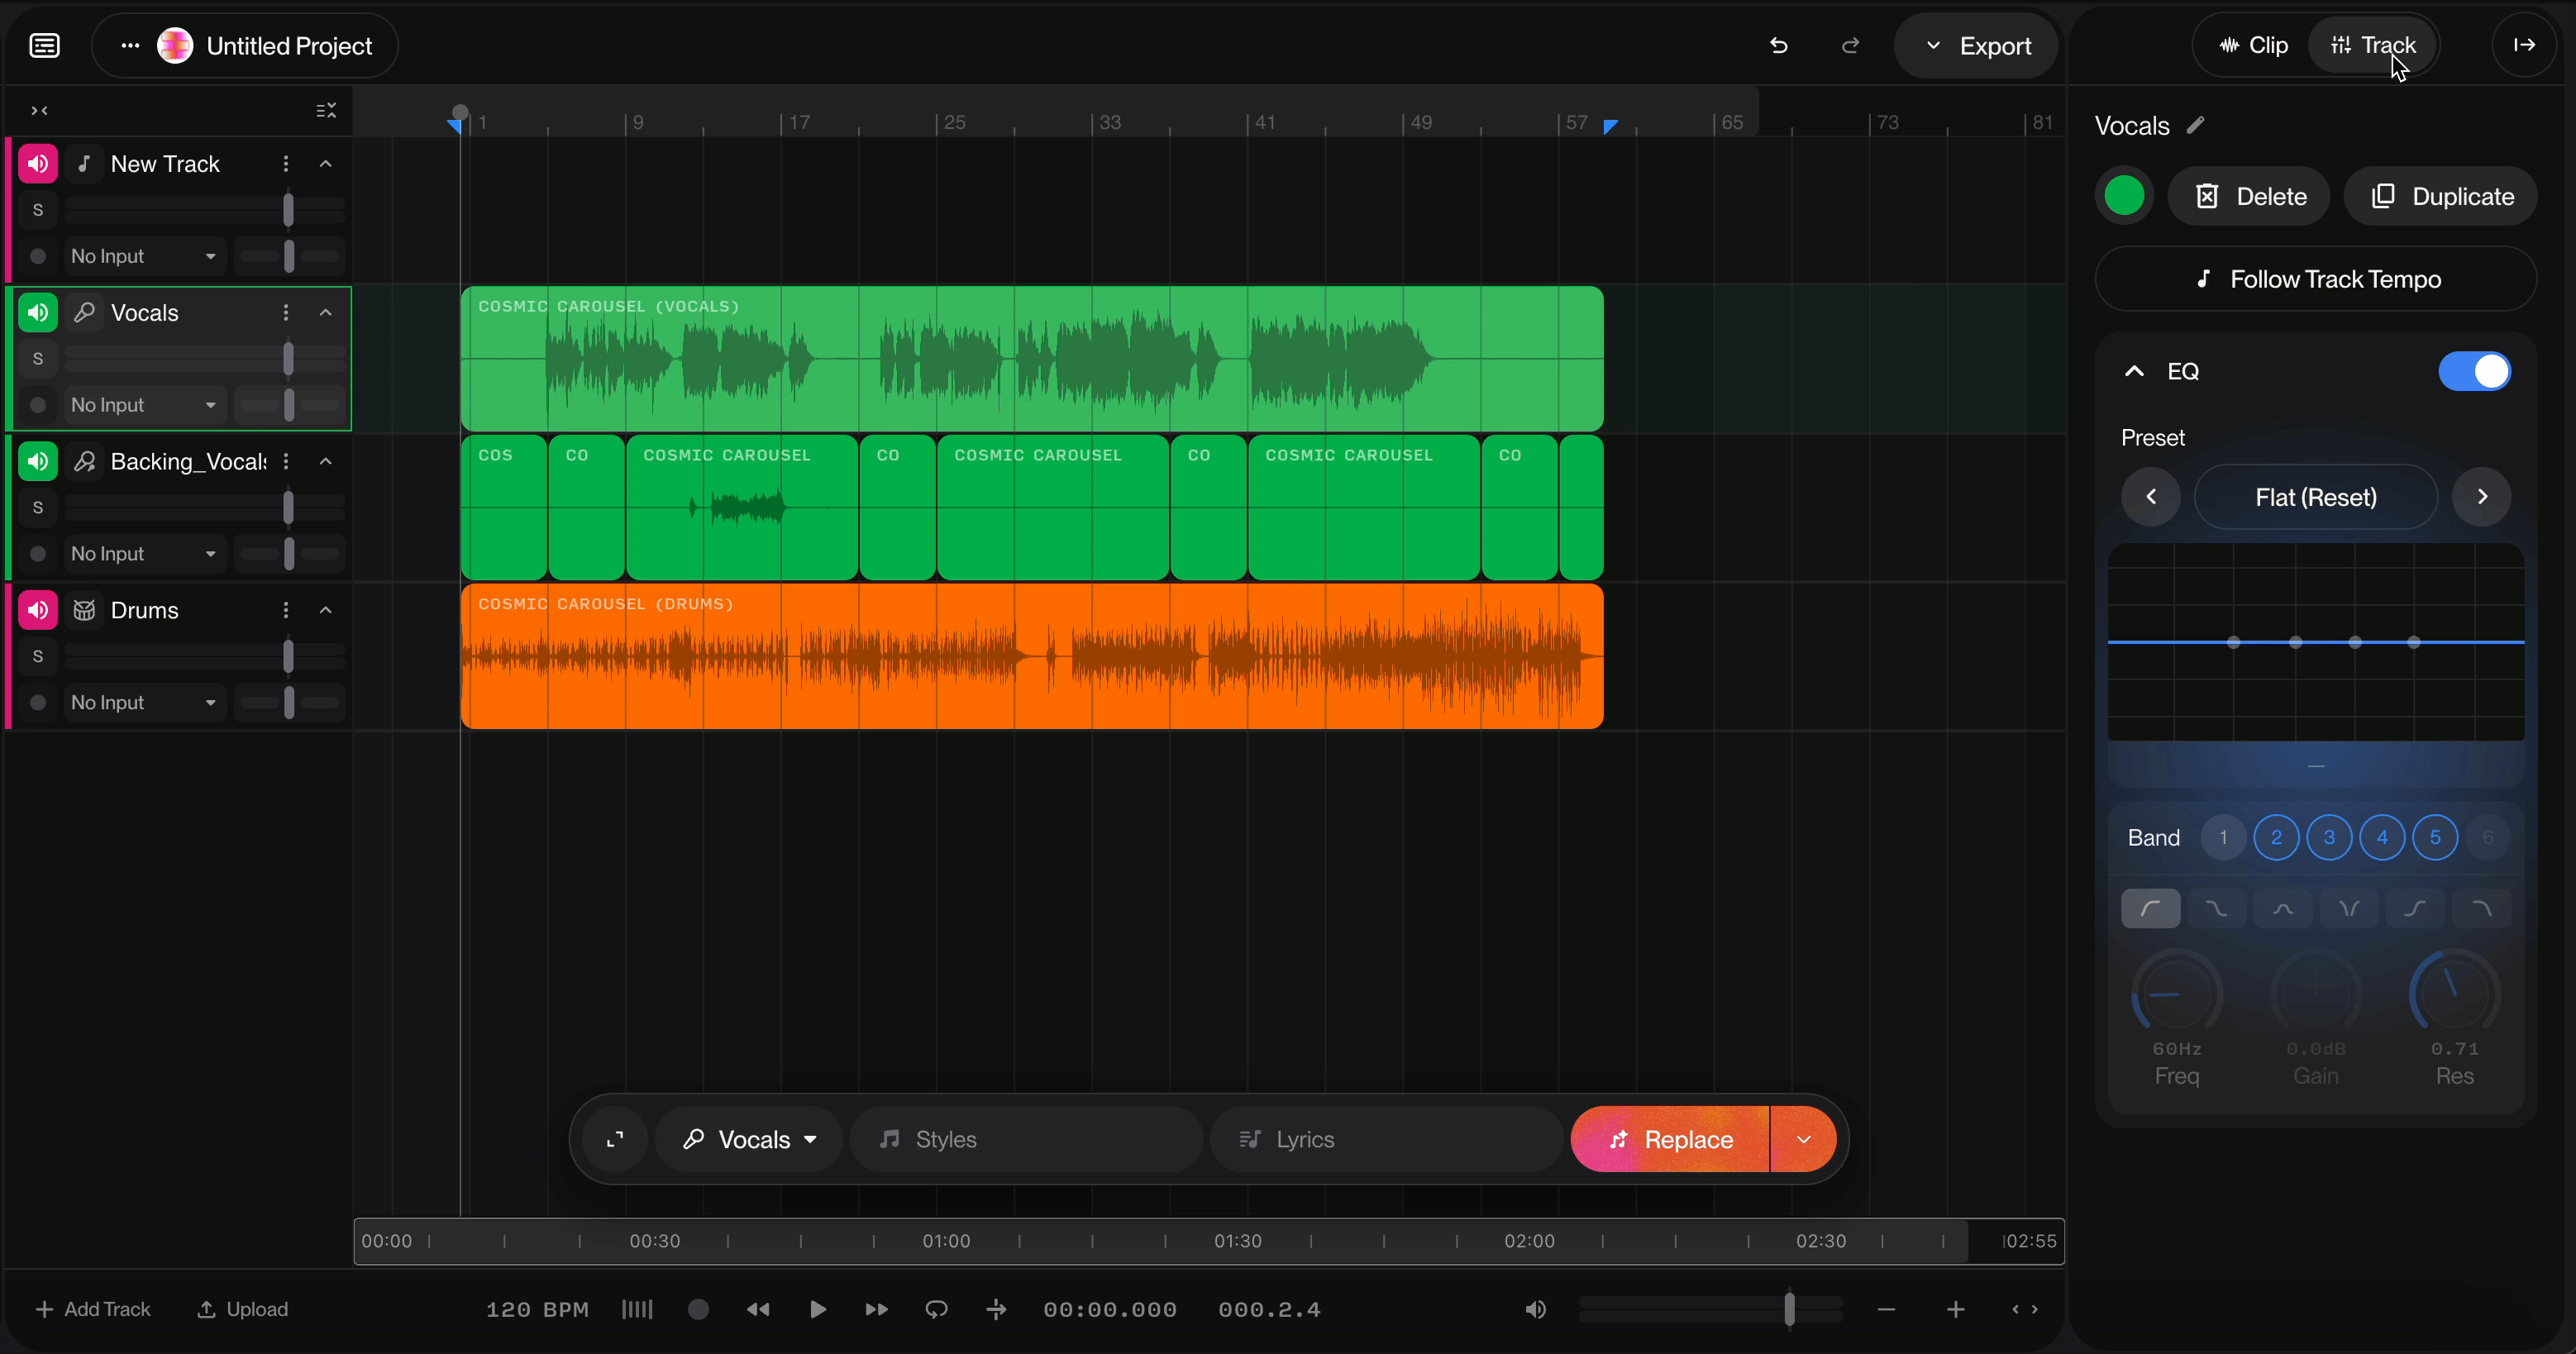
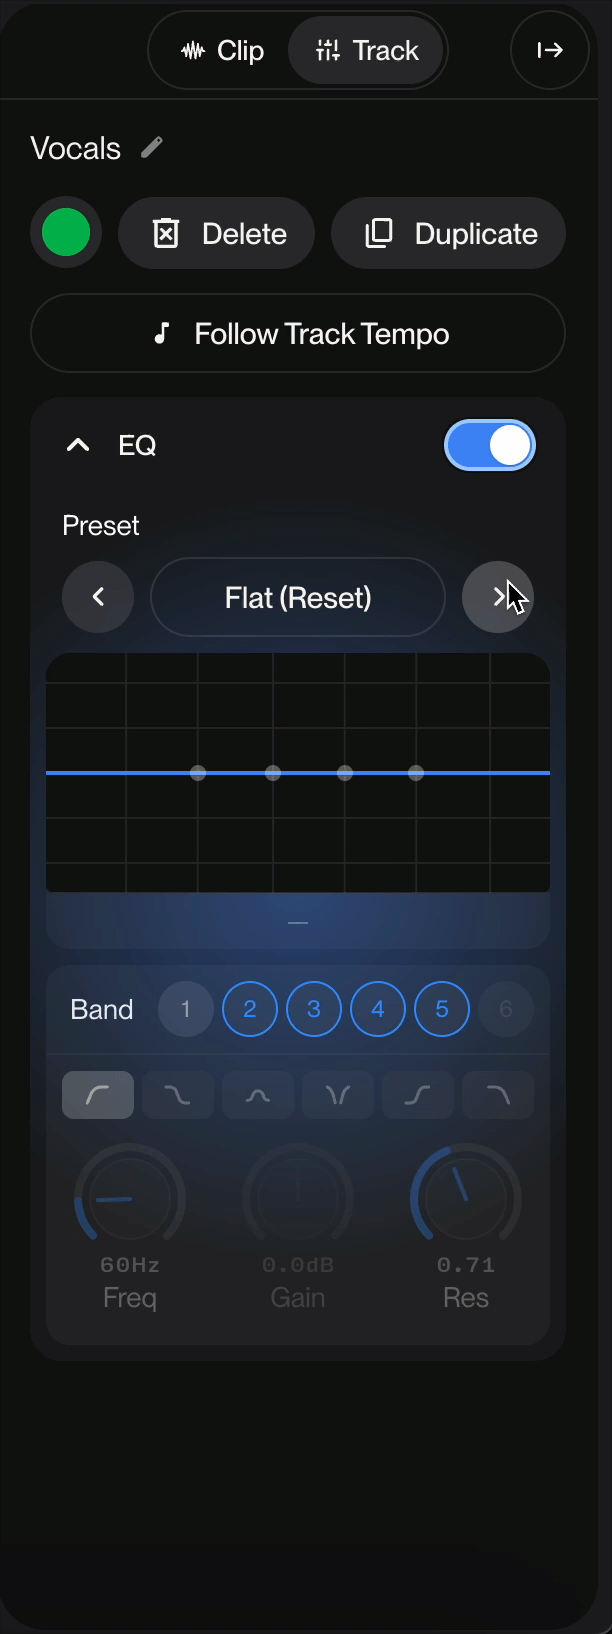
Located in the top-left corner, the EQ toggle switch enables or disables the equalizer processing. When enabled (blue), the EQ actively processes your audio signal. To access the EQ for your track, select the track you want to use the EQ on, then click Track in the Details Panel.
Preset Management
Preset Display: Shows the current preset name (displayed as "[Custom]" when manually adjusted)
Navigation Arrows: Browse through available presets using the left and right arrow buttons
Frequency Response Graph
The visual display shows your EQ curve in real-time:
Horizontal axis: Represents the frequency spectrum (low to high frequencies)
Vertical axis: Represents gain (boost or cut in dB)
Blue line: Your current EQ curve
Control points: Draggable nodes that represent each active band
Band Selection
The equalizer offers 6 selectable bands (numbered 1-6). Active bands are highlighted in blue, allowing you to adjust multiple frequency ranges simultaneously. You can enable or disable individual bands as needed.
Filter Types
Six different filter shapes are available (shown as wave icons):
Bell/Peak (first icon - selected in image): Boosts or cuts a specific frequency range

High-pass: Removes low frequencies below the set point

Low-pass: Removes high frequencies above the set point

High-shelf: Boosts or cuts all frequencies above the set point

Low-shelf: Boosts or cuts all frequencies below the set point

\Notch: Creates a narrow cut at a specific frequency

Adjustable Parameters
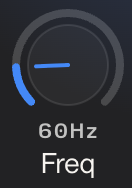
Freq (Frequency)
Range: Displayed as "60Hz" in the example
Function: Sets the center frequency for the selected band
Rotate the dial to select which frequency range you want to adjust
Lower values affect bass, mid-range values affect vocals and instruments, higher values affect brightness and air
Gain
Range: Displayed as "-0.4dB" in the example
Function: Boosts (+) or cuts (-) the volume at the selected frequency
Positive values enhance the selected frequency range
Negative values reduce the selected frequency range
Typical range: -12dB to +12dB

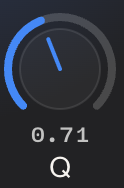
Res (Resonance/Q Factor)
Range: Displayed as "0.71" in the example
Function: Controls the width of the frequency band being affected
Lower values create a wider, more gentle curve
Higher values create a narrower, more precise adjustment
Use narrow Q for surgical corrections, wider Q for musical shaping
Tips for Use
Getting Started:
Enable the EQ using the top toggle switch
Select a band (1-6) you want to adjust
Choose an appropriate filter type for your needs
Adjust Freq to target the desired frequency range
Use Gain to boost or cut as needed
Fine-tune Res to control how wide or narrow the effect is
Best Practices:
Start with subtle adjustments (±3dB) and increase only if needed
Use cuts rather than boosts when possible for more natural results
Enable only the bands you're actively using
Use the visual graph to ensure your EQ curve is smooth and musical
Save useful settings as presets for quick recall
Common Applications:
Remove muddiness by cutting around 200-400Hz
Add presence by boosting around 2-5kHz
Reduce harshness by cutting around 3-4kHz
Add air and sparkle by gently boosting above 10kHz
Control bass by adjusting below 100Hz